SSO with Smarty setup guide
Before you start, confirm your Smarty account access
- Only Account Owners can access and modify SSO configuration settings.
- If you’re using SSO across multiple Smarty accounts, choose one to be your primary SSO account to hold the configuration. The other accounts will share this single SSO configuration.
Step 1: Login to your Smarty dashboard
- Go to your Smarty account dashboard and log in with your credentials.

Step 2: Access the Single sign on section
- From the left-hand sidebar, select Single sign on.

Step 3: Name Your SSO organization
- Type in your SSO organization name. (This name will be part of your login URL, so it must only include valid URL characters. You can find valid URL characters here.)
- Select Create when you’re done.

Step 4: Choose your authentication protocol
- Select the authentication protocol you want to configure: OIDC or SAML.

Step 5: Setting up your configuration
OIDC | SAMLFor OIDC:
- Name your OIDC configuration.
-
Paste the following details from your identity provider:
- Issuer/Domain
- Client ID
- Client Secret
- You can adjust the scopes or continue using the default settings.
- Select Create to save your OIDC configuration.

Activate, edit, or delete your OIDC configuration.
You’ll now see your OIDC configuration saved in your dashboard.

- From the Identity Provider Configuration section, copy the 'Callback URL' and paste it into your IdP.
- To activate, select Activate. (Once activated, all users will need to log in using SSO credentials—Smarty usernames and passwords will no longer work.)

- Select Yes, Activate.

To edit or delete your OIDC configuration
- To edit, select Edit and update your details.
- To delete, select Edit and then choose Delete Configuration.
You can deactivate SSO anytime by selecting the Deactivate button, which will revert authentication back to Smarty usernames and passwords.

That's it! You've completed your SSO Setup. If you need anything, we're here to help. You can contact support via chat, email, or phone. Monday to Friday, 7:00 am - 5:00 pm MT.
For SAML:
- Name your SAML configuration
- Select Next.

-
Paste the following URLs from your Smarty account into your IdP SAML configuration settings:
- Single sign on
- Audience
- Single logout
- Select Next.

- Paste the required fields from your identity provider into your Smarty configuration, either your Metadata URL or the RAW Metadata in XML format.
- Modify the default settings if necessary.
- Select Finish to complete the setup.

Activate, edit, or delete your SAML configuration
You’ll now see your SAML configuration saved in your dashboard.

-
To activate, select Activate.
(Once activated, all users will need to log in using SSO credentials—Smarty usernames and
passwords will no longer work.)
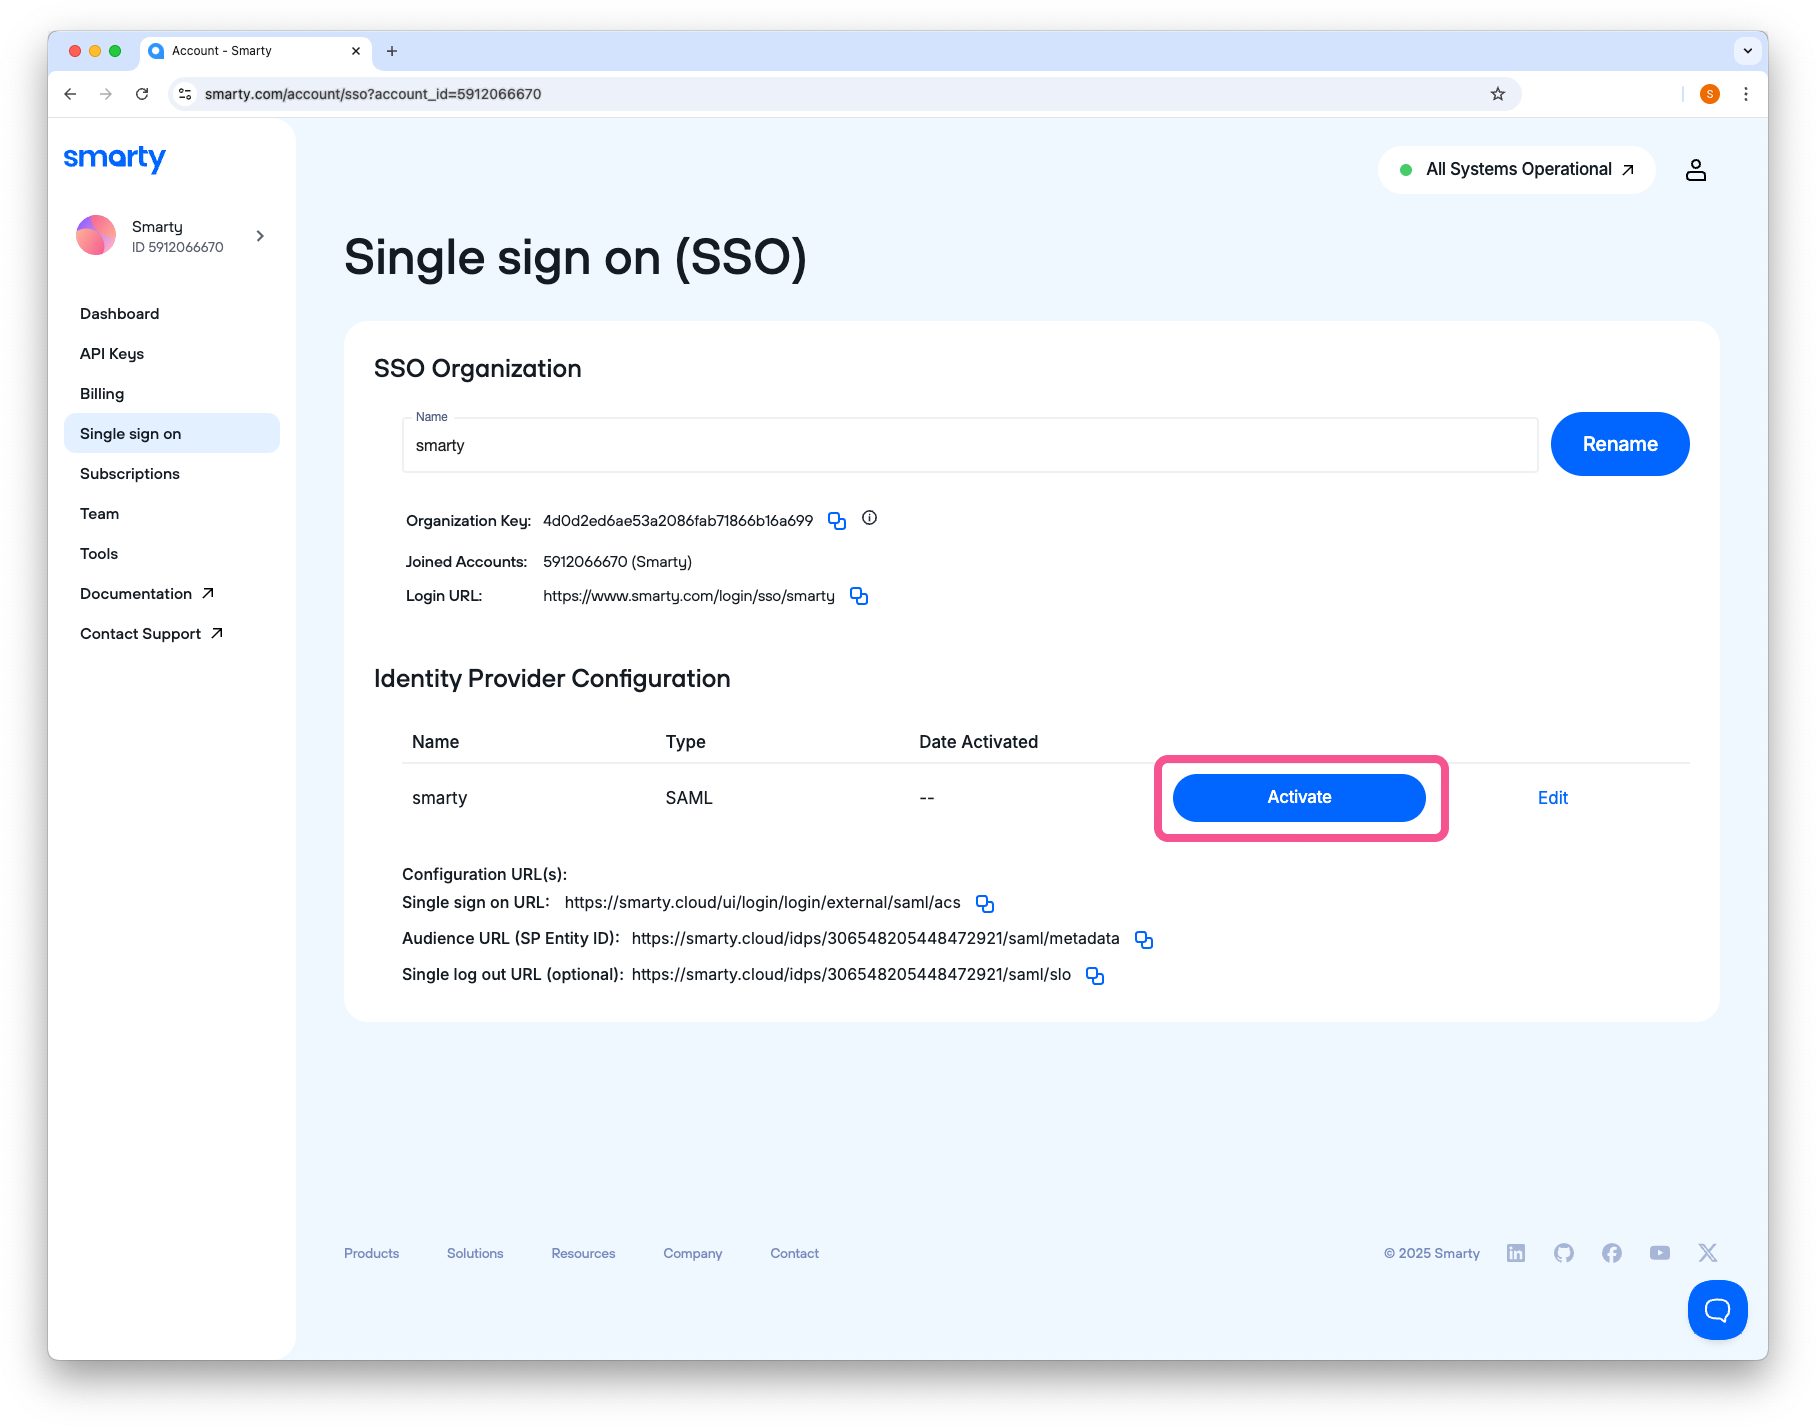
-
Select Yes, Activate.


To edit or delete your SAML configuration
- To edit, select Edit and update your details.
- To delete, select Edit and then choose Delete Configuration.
You can deactivate SSO anytime by selecting the Deactivate button, which will revert authentication back to Smarty usernames and passwords.

That's it! You've completed your SSO Setup. If you need anything, we're here to help. You can contact support via chat, email, or phone. Monday to Friday, 7:00 am - 5:00 pm MT.