
QGIS Geocoding Plugin documentation
With Smarty’s QGIS Geocoding Plugin, you can validate and geocode US addresses directly in QGIS. The plugin returns standardized addresses, coordinates, geocode precision, and other location data for your mapping and spatial analysis workflows. Before you can access the full capabilities of this tool, you’ll need to sign up for a free trial or subscription to US Address Verification or International Address Verification. Learn more about the features and capabilities of the QGIS Geocoding Plugin here.
**Note: This plugin isn’t intended to be used with beta versions of QGIS. We suggest using it with the most recent stable version of QGIS for the best performance.
Quick start video
Downloading the QGIS Geocoding Plugin
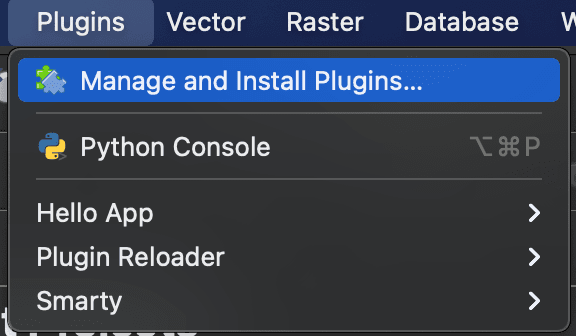
- On your QGIS Desktop Application, navigate to the 'Plugins' option at the top of the toolbar and select 'Manage and Install Plugins...'
- Navigate to the 'All' tab and search 'Smarty.'
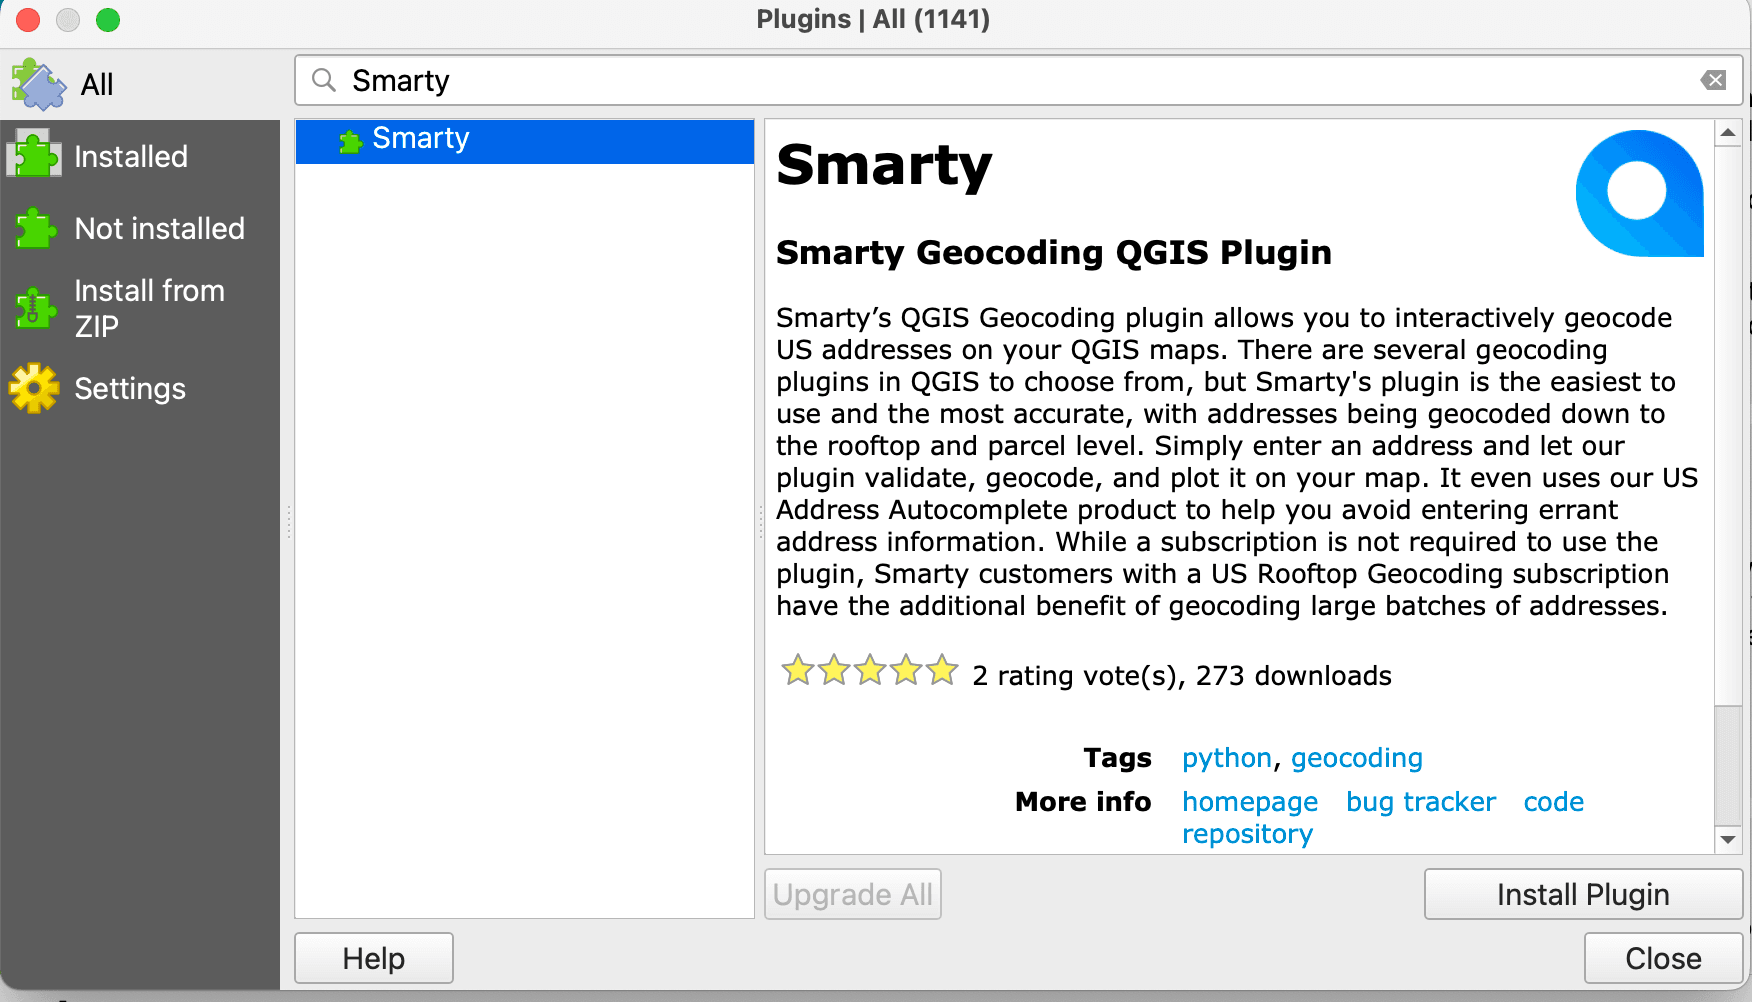
- Click 'Install Plugin.'
And voila! You should see the Smarty plugin pop up next to the rest of your plugins in your QGIS toolbar!

 (Note: this is the icon for the Smarty plugin.)
Single lookup
Makes use of the US Street Address API and also the US Autocomplete API through the Smarty Python SDK. You'll need to have an active subscription or free trial to US Address Verification and US Address Autocomplete before you can use the plugin.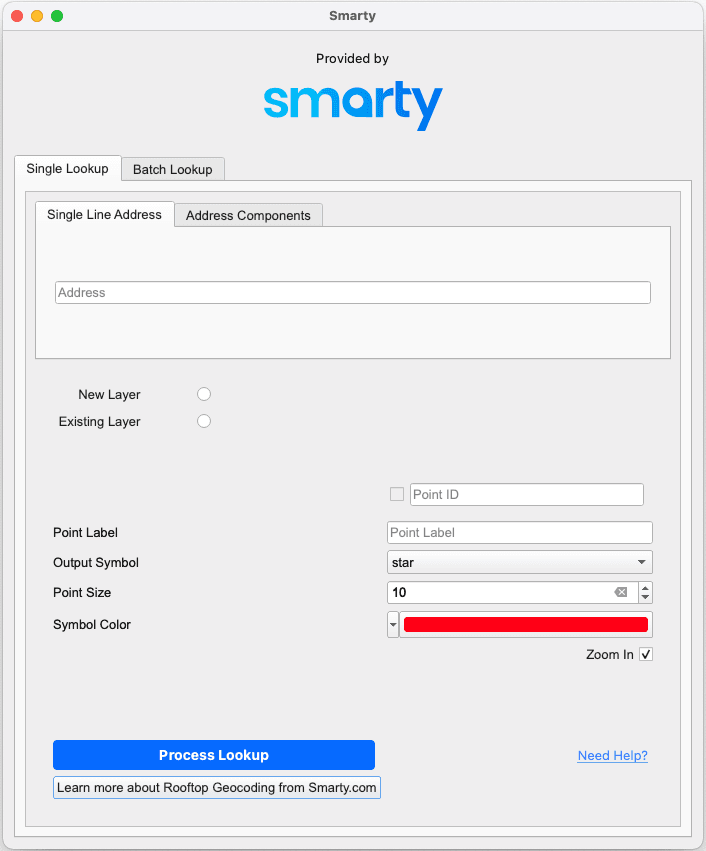
Single line address tab
Allows you to geocode one address at a time.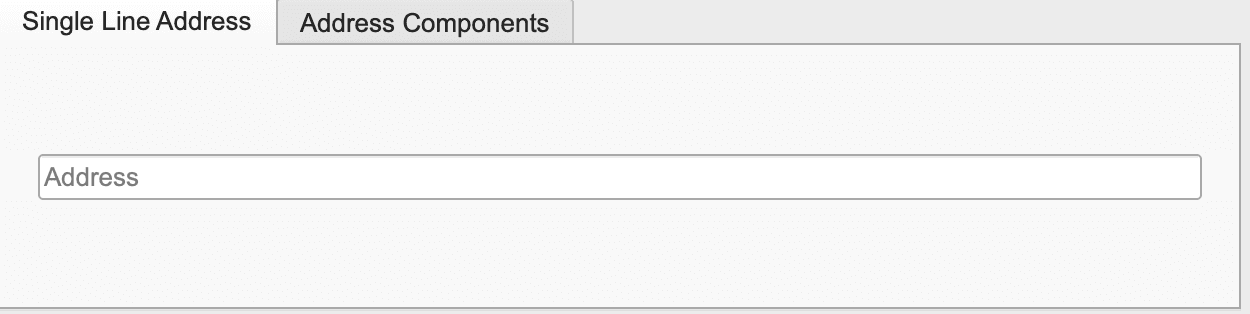
The Single Line Address tool is free of charge and doesn’t require a Smarty subscription.
Address text box: The complete address (address, city, state, ZIP Code).
- Freeform input can be up to 100 characters, but only the first 50 will be considered for the street portion of the address. Freeform inputs should not include country information (like "USA")
- Users can geocode an address by adding it to the 'Address' text box. The Smarty US Autocomplete API will provide suggestions as you type
Addresses that contain secondary units won’t return address information on entries associated with that address
(NOTE: this is a limitation of the QGIS plugin)
This is processed in what we call a "freeform" input (this is when the entire address is sent through the street field)
(NOTE: The API is more rigid with freeform addresses (as it utilizes a strict match mode). Addresses that return an invalid match may have a higher success rate when entered in the 'Address Components' tab)
Address components
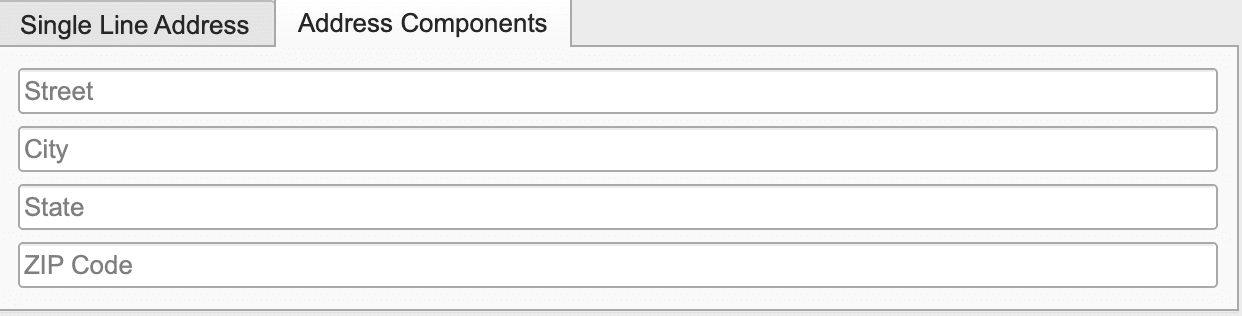
Street: The street line of the address, or the entire address ("freeform" input).
City: The city name.
State: The state name or abbreviation.
ZIP Code: The ZIP Code.
(NOTE: When submitting addresses in this way, setting match to invalid will prevent the API from finding valid matches for ambiguous address input)
New layer vs. existing layer
Users must choose either to create a new layer or to use an existing layer before they can geocode an address.
The following error message will be returned if a layer is not specified:
New layer
If the user chooses to create a new layer, a text box will appear for them to name the new layer. If the user doesn’t put anything in this box, it’ll default to naming the new layer 'Smarty.'
Existing layer
The 'Existing Layer' option will be disabled unless there are layers in the current project that have been created by Smarty.
The 'Existing Layer' will only allow users to add addresses to layers and shapefiles created by the Smarty plugin and currently open in the open project.
If the user chooses to add the address to an existing layer, a drop-down box will appear with layers previously created by the Smarty plugin, from which they can select the layer to which they would like to add the address.
Point ID


The user can add an ID to the address they add to a new or existing layer.
If the user has chosen to use an existing layer that assigns an ID to every address, the user WILL be required to add an ID for that address. They won’t be able to process their address without adding an ID. They will see an error message like this:
If the user wants to add an ID to a new layer (that doesn't NEED an ID, but they indicated a desire to add an ID by checking the 'Point ID' check box) and doesn’t enter anything in the ID text box, they’ll receive the following error:
If the user has chosen an existing layer that doesn’t have an ID for every address, then the 'Point ID' checkbox and the corresponding text box will remain disabled. The user won’t be able to add an address ID to the existing layer.
Point label

The user can add one label for the point:
- If the user doesn’t add anything to the 'Point Label' textbox, no label will be set or shown on the output
- If the user does add text to the 'Point Label' textbox, it’ll display underneath the lat/long point
Output symbol

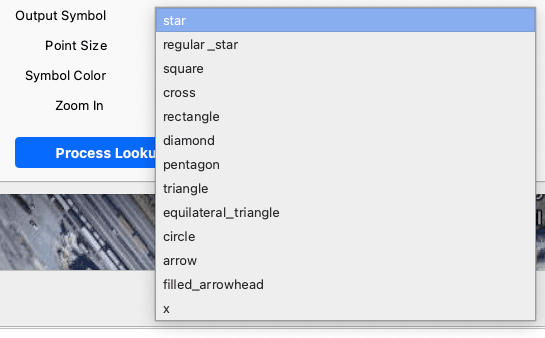
The default symbol is 'star.'
The user can choose which output symbol they would like to see when the address has been processed. If our Smarty API finds a valid match, the plugin will output the geolocation of the address represented by the symbol, at the address's latitude and longitude.
The user can choose from this list of symbols in the plugin:
- 'star', 'regular_star', 'square', 'cross', 'rectangle', 'diamond', 'pentagon', 'triangle', 'equilateral_triangle', 'circle', 'arrow', 'filled_arrowhead', and 'x'
- The user can also change the symbology using QGIS after the address has been processed by:
- Clicking on layer → Symbology → Simple Marker
Here is an example of the output of the geocode of an address using the symbol 'star':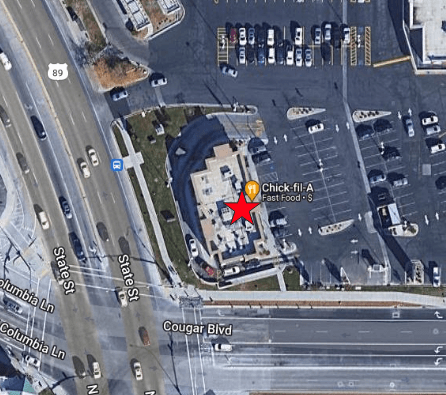
Point size

The user can change and set the size of the symbol (the number represents millimeters).
The default is set to 10 mm.
This can be changed using QGIS after the address has been processed by:
- Clicking on layer → Symbology → Size
Symbol color

The user can choose the color of the symbol that is added to the layer.
The default color is:
- HEX: #ff0016
- RGB: 255, 0, 22
What is shown in the dialogue box is the default color.
The user can change the color of symbols after the address has been processed by:
- Clicking on the layer → Symbology → Color
Zoom in

The user can zoom in on the output point.
The checkbox is checked by default, and QGIS will zoom in on the processed address.
Process lookup

This button will send the address to the Smarty API, which will return the API results.
Visit Smarty

A link that will take users to the Smarty US Rooftop Geocoding page, where they can:
- Find more information on our US Rooftop Geocoding product
- Browse US Rooftop Geocoding subscription prices
- Try the US Rooftop Geocoding live API
Results
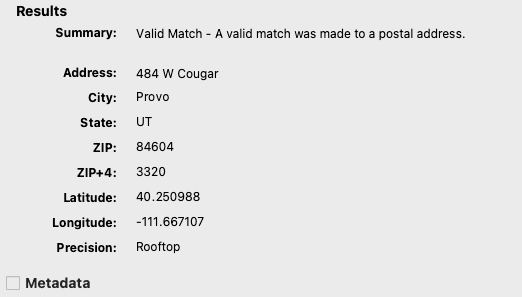
Summary: Returns a summary of the results from the address sent to the API.
If the API finds no match for the address, the user will see:
No match - The address is invalid.If the API finds no match for the address, but a PO Box for the address, the user will see:
No match - PO Box Only. The ZIP Code is PO Box delivery only.If the API finds a match for the address, but the address is vacant, the user will see:
Match-vacant - The address is valid but vacant.If the API finds a match for the address, but the address is inactive, the user will see:
Match-Inactive - The address is valid but inactive.If the API finds a match for the address, but the address isn’t a postal match, the user will see:
Match-non-postal - A match was made to a valid non-postal address.If the API finds a match for the address, and the address is a postal address, the user will see:
Valid match - A valid match was made to a postal address.
Address: A combination of the
- Primary number, street pre-directional, street name, and street post-directional
City: The USPS-preferred city name for this particular address, or an acceptable alternate if provided by the user.
ZIP: The 5-digit ZIP Code.
Zip+4: The 4-digit add-on code (more specific than 5-digit ZIP).
Latitude: The horizontal component used for geographic positioning, based on the WGS84 coordinate system. It is the angle between 0° (the equator) and ±90° (north or south) at the poles. It is the first value in an ordered pair of (latitude, longitude). A negative number denotes a location below the equator; a positive number is above the equator. Combining latitude and longitude values enables you to pinpoint addresses on a map.
Longitude: longitude decimal(9,6) The vertical component used for geographic positioning, based on the WGS84 coordinate system. It is the angle between 0° (the Prime Meridian) and ±180° (westward or eastward). It is the second number in an ordered pair of (latitude, longitude). A negative number indicates a location west of Greenwich, England; a positive number indicates a location east of Greenwich, England. Combining latitude and longitude values enables you to pinpoint addresses on a map.
Precision: Indicates the precision of the latitude and longitude values.
- Unknown — Coordinates not known. Reasons could include: address is invalid, military address (APO or FPO), or lat/long coordinates not available.
- Zip5 — Accurate to a 5-digit ZIP Code level (least precise)
- Zip6 — Accurate to a 6-digit ZIP Code level
- Zip7 — Accurate to a 7-digit ZIP Code level
- Zip8 — Accurate to an 8-digit ZIP Code level
- Zip9 — Accurate to a 9-digit ZIP Code level (most precise with the basic subscription)
- Street — Accurate to a position along the street proportional to the house/building number.
- Parcel — Accurate to the centroid of a property parcel
- Rooftop — Accurate to the rooftop of a structure for this address
(NOTE: Concerning addresses for which the ZIP9 precision isn’t available, the ZIP# precision is interpolated based on neighboring addresses. Thus, ZIP7 is an average of all the lat/long coordinates of nearby ZIP Codes that share those first 7 digits)
Metadata
Extra information on the given address.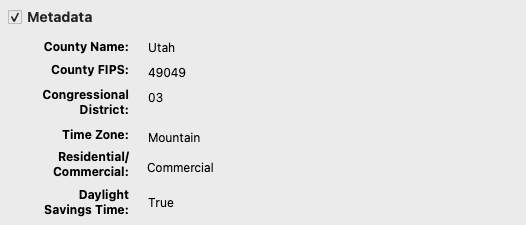
County name: The name of the county in which the address is located.
County FIPS: The 5-digit county FIPS (Federal Information Processing Standards) code. It is a combination of a 2-digit state FIPS Code and a 3-digit county code assigned by the NIST (National Institute of Standards and Technology).
Congressional district: The congressional district to which the address belongs. Output will be two digits from 01 - 53 or "AL." "AL" means that the entire state (or territory) is covered by a single congressional district. These include Alaska, Delaware, Montana, North Dakota, South Dakota, Vermont, Wyoming, Washington, D.C., the Virgin Islands, and other territories.
Time zone: Indicates the common name of the time zone associated with the address.
- Valid responses:
- Alaska, Atlantic, Central, Eastern, Hawaii, Mountain, None, Pacific, Samoa, UTC+9, UTC+10, UTC+11, UTC+12
Residential/commercial: Residential delivery indicator (residential or commercial)
- Residential — The address is a residential address
- Commercial — The address is a commercial address
- [blank] — This happens when the address is invalid, or we don't have enough information to ascertain RDI status. Bulk Address Validation translates a [blank] RDI value to "Unknown"
(NOTE: For some reason, known only to the US Postal Service, PO Boxes are always marked as "Residential")
Daylight Saving Time: Indicates if the time zone "obeys," or, in other words, adjusts its clocks forward and back with the seasons. This information is particularly useful to determine time in other time zones with areas that may or may not use daylight saving time - for example, Arizona, Hawaii, and, of all places, Indiana.
- True — Time zone observes daylight saving time
- If dst is absent from the response, then the time zone doesn’t observe daylight saving time
Batch lookup
Smarty customers with a subscription to US Rooftop Geocoding also have the benefit of batch geocoding. This feature is useful when you need to visualize the relationships among several addresses at once. Visit our US Rooftop Geocoding pricing page for more information regarding subscriptions.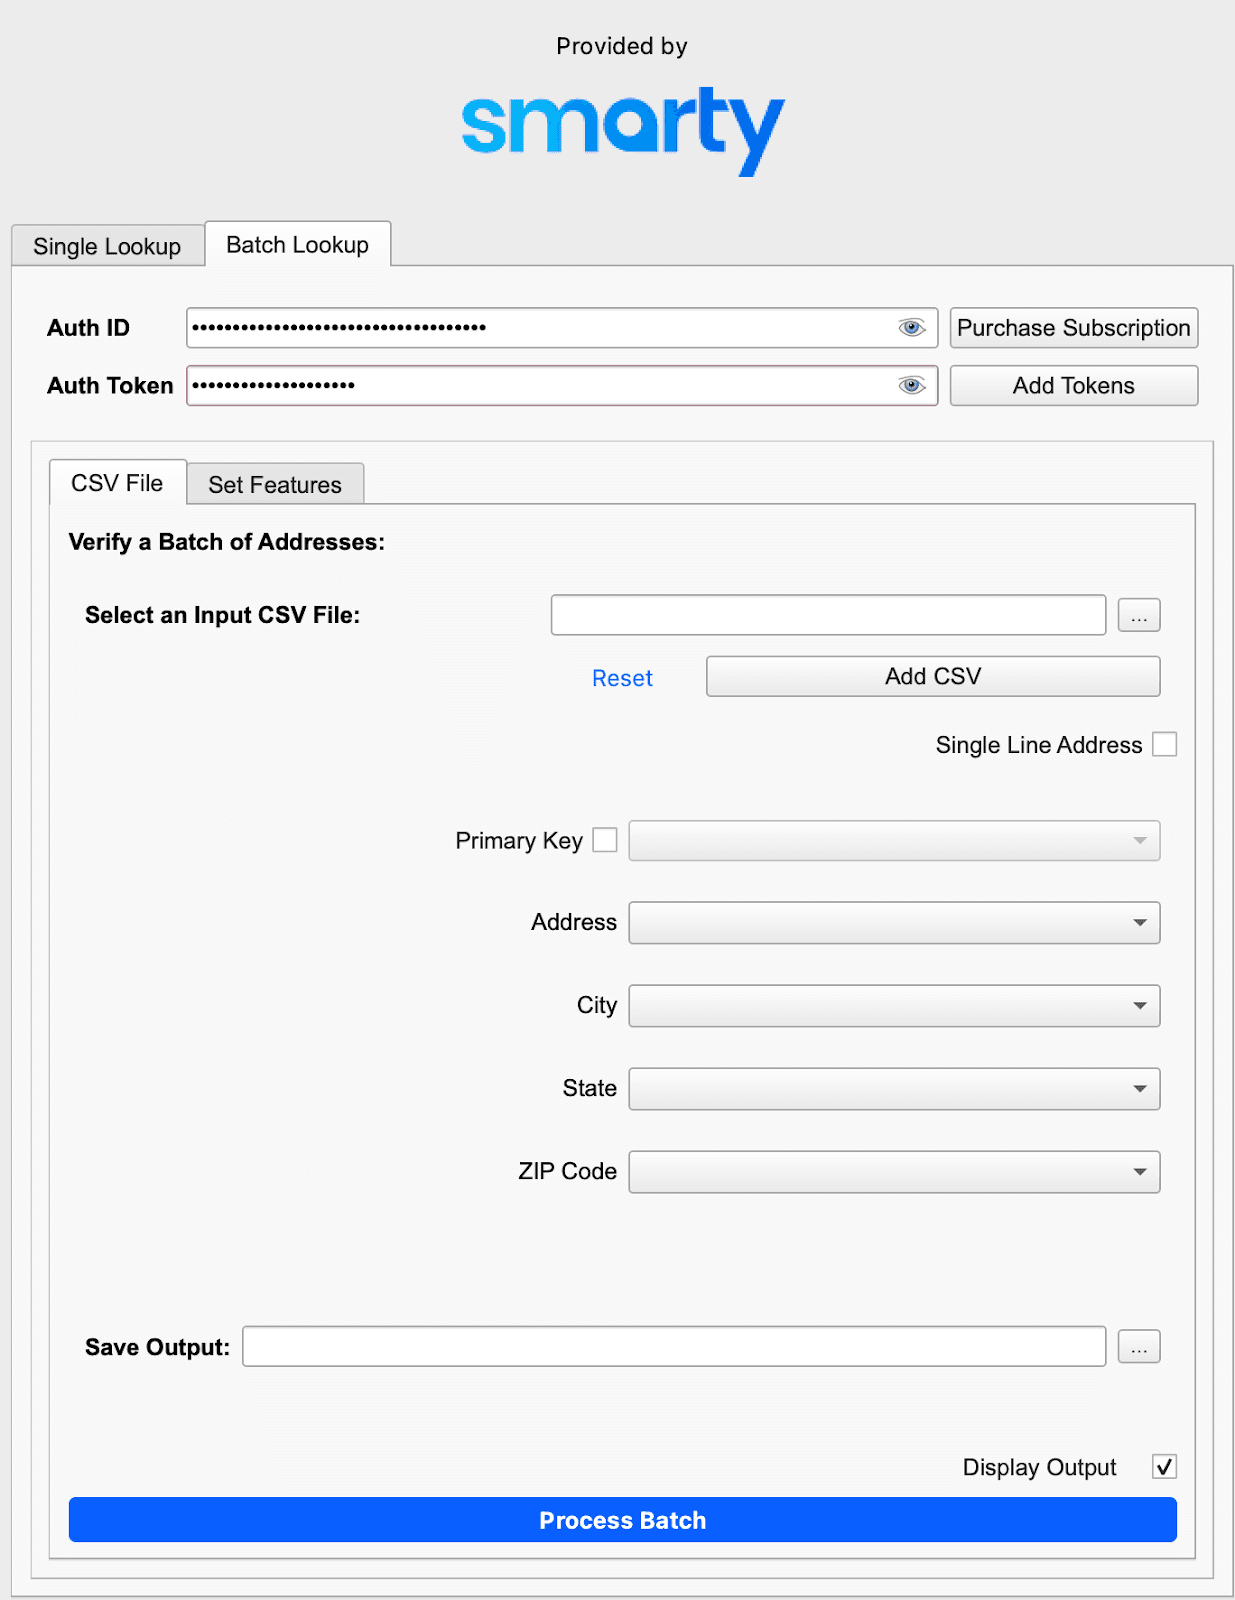
Authentication

This is where users should provide their Smarty Auth ID and Auth Token.
If no valid credentials have been added to the plugin, the user won’t be able to use this section of the dialog box.
To add credentials:
- User enters their Auth ID and Auth Token
- When the user clicks on the 'Add Tokens' button, the plugin will run a lookup on the following Chick-Fil-A valid address: '484 W Bulldog Blvd, Provo, UT 84604'
If the user adds a valid Auth ID and Auth Token, they will receive a message like this:

(This portion of the dialogue box will be set to enabled so that they can perform batch lookups)
- If the user adds invalid credentials, they’ll receive an error message like this:

- If the user forgets to add the Auth ID, they’ll receive an error message like this:

- If the user forgets to add the Auth Token, they’ll receive an error message like this:

- If the user forgets to add the Auth ID and the Auth Token, they’ll receive an error message like this:

(NOTE: Users should add a Secret Key and NOT an Embedded Key. Through the use of our smartystreets_python_sdk, we’re building the credentials for the client using the StaticCredentials object.)
CSV file
A tab where users can add information regarding their CSV that contains address information.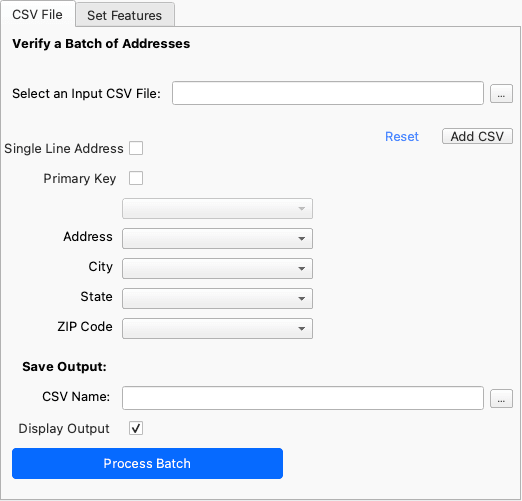
Select an input CSV file: This is where the user can choose a CSV file on their computer containing address information they would like to process.
Reset: If the user clicks the 'Reset' button, the fields will be reset, and the chosen CSV file will be cleared.
Add CSV: If the user clicks the 'Add CSV' button, the drop-downs for 'Address', 'City', 'State', and 'ZIP Code' will be populated with all the column names in the provided CSV file.
The plugin will search for column names to autopopulate the desired fields:
- Address dropdown searches for column names:
- 'address', 'street', and 'addr'
- City dropdown searches for column names:
- 'city'
- State dropdown searches for column names:
- 'state' and 'st'
- ZIP Code dropdown searches for column names:
- 'Zip', 'zipcode', 'zip_code', and 'zip code'
(NOTE: These searches are case-insensitive)
If none of the dropdowns find relevant column names, it’ll autopopulate with '----'.
The user can change which column they would like to use for each dropdown.
Component addresses
If the user's CSV has the address components in different columns, then they’ll want to use the component address feature by NOT checking the 'Single Line Address' box.
If the user's CSV has the address components in different columns, they must provide which of their CSVs' columns correspond with the dropdowns named:
- Address
- City
- State
- ZIP Code
If the user has an ID for each address, they need to check the 'Primary Key' checkbox and indicate which CSV column represents the ID for each address.
- If this information is given, the plugin will output the ID with each of the processed addresses
- If the information isn’t provided, the plugin will auto-generate an ID for each address processed, starting at 1 and incrementing with each address. This information will be in the output of the batch
Single line addresses
If the user's CSV has all address components in a single column, they should check the checkbox labeled 'Single Line Address'.
If the user's CSV has all address components in a single column, they must provide that information in the 'Address' dropdown.
If the user has an ID for each address, they need to check the 'Primary Key' checkbox and indicate which CSV column represents the ID for each address.
If this information is provided, the plugin will output the ID for each processed address.
If the information isn’t provided, the plugin will automatically generate a unique ID for each address processed, starting at 1 and incrementing with each address. This information will be included in the batch output.
Primary key: This is a way for the user to indicate if they already have an ID associated with every address.

If they provide a column that’s associated with their ID, then it’ll appear on the output with every address.
If they do not provide a column associated with their ID, we will generate a unique ID for each address starting at 1.
Address: The street line of the address, or the entire address ("freeform" input).
- Freeform input can be up to 100 characters, but only the first 50 will be considered for the street portion of the address. Freeform inputs should omit any form of country information (like "USA")
City: The city name.
State: The state name or abbreviation.
ZIP Code: The ZIP Code.
Save output - CSV name: A place for the user to indicate where they would like the CSV that contains the processed and cleansed addresses on their computer.
- This CSV will be saved once the entire batch has been processed
Display output: The user can decide whether to display the processed addresses on a newly created layer.
- This checkbox is checked by default, and the addresses will be displayed after all the addresses have been processed
- If the user doesn’t want to create a new layer or have the addresses added to this layer, then the user can uncheck this box
Process batch: This button starts processing the batch addresses.

- The button will show the user the % of completed addresses as the batch is running
Set features
Tab where users can configure the appearance of addresses in the batch.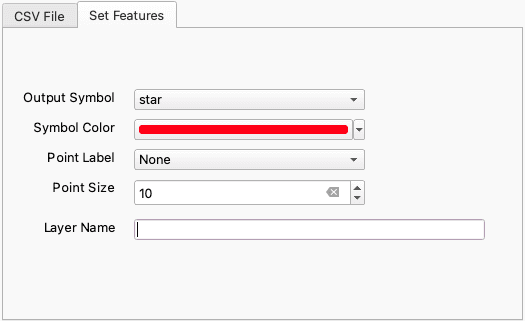
Output symbol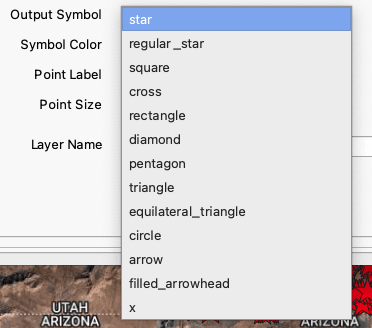
The default symbol is 'star.'
The user can choose which output symbol they would like to see when the address has been processed. If Smarty's API finds a valid match, the plugin will output the geolocation of the address represented by the symbol, at the address's latitude and longitude.
Here is an example of the output of an address using the symbol 'star':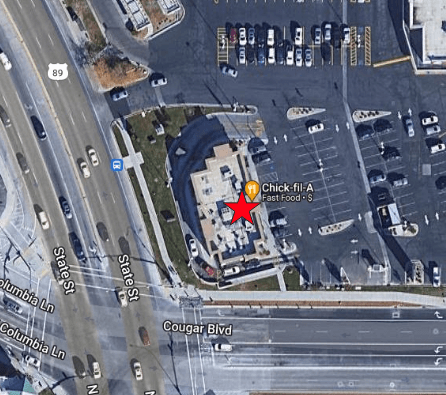
The user can choose from this list of symbols in the plugin:
- Star, regular_star, square, cross, rectangle, diamond, pentagon, triangle, equilateral_triangle, circle, arrow, filled_arrowhead, and x
- The user can also change the symbology using QGIS after the address has been processed
Symbol color
The default color is:
- HEX: #ff0016
- RGB: 225, 0, 22
The user can choose the color of the symbol that’s added to the layer. What is shown in the dialogue box is the default color.
Point label
The default value is 'None.'
'None' → won’t add a label to the output points or to the attributes associated with that layer.
This is a dropdown that gets populated with the columns from each provided CSV (plus 'None'). The user can choose one of these columns for the label. it’ll appear underneath the point for the address.
Point size
The default is set to 10 mm.
The user can change and set the size of the symbol.
This can be changed using QGIS after the address has been processed.
Layer name
The default value is 'Smarty.'
- If the user doesn’t add anything to the 'Layer Name' textbox, it’ll be named 'Smarty'
This is where the user can specify the name of the newly created layer.
4 more ways to validate in bulk
Was this helpful?